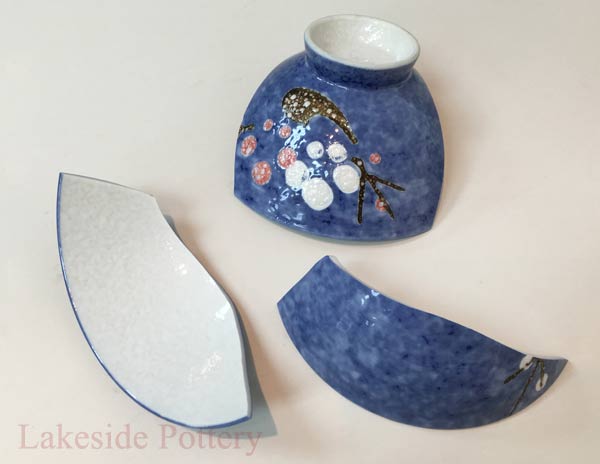
How to Fix / Restore Cleaved Pottery, Ceramic or China
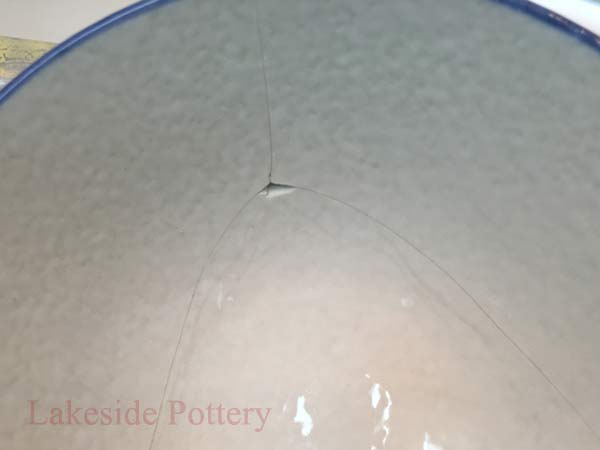
It is possible to perform seamless repairs to damaged ceramic and pottery objects. The lesson below will address the first two steps which are a) mending the cleaved pieces and b) filling and sanding the visible break lines, chips and gaps using the all-time commercially available materials. This lesson applies only to not-porous or slightly porous materials such every bit porcelain, stoneware, resin and drinking glass.
Pottery Repair Video Tutorial
When repairing more porous materials such Terracotta, stone or plaster, epoxy is required to be placed on both sides and heating the surface to 100 - 140 degrees F prior to the epoxy application on both sides of the object improves bonding. Be aware, heating surfaces speeds up cure time and therefore reduces workability. You take to achieve proper positioning twice equally fast as you lot would with porcelain and stoneware. The sanding process of porous materials is also unlike than what is described below.
If you choose to do it yourself, this tutorial / lesson will assist yous in repairing your broken ceramic object using available materials and tools, saving you the cost of professional repair. If you decide to use our repair services, we will exist glad to provide you with an approximate for the repair. Yous may want to find out the value of your broken ceramic or porcelain figurine or vessel first before investing in repairing it.
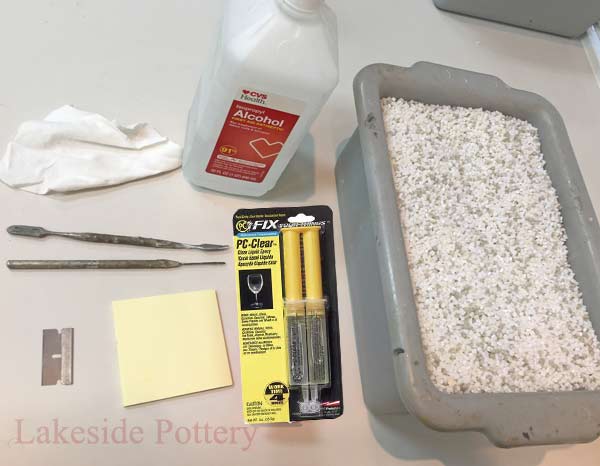
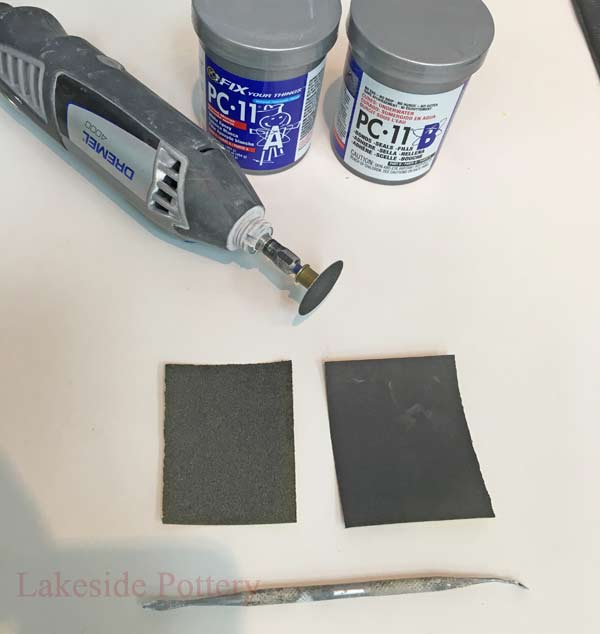
What yous volition demand for mending steps: one. Two-part 5 min PC Articulate epoxy 2. Wooden stick or a pin-tool iii. Container with pvc pebbles or rice 4. Clay 5. Razor blade 6. Denatured or 91% Alcohol 7. Rag eight. Paper pad to mix Epoxy on
Of import: Ceramic restoration materials are not food safe, liquid or heat proof (over 190 caste F) and repaired items should non be used on cooking or food serving ware more...
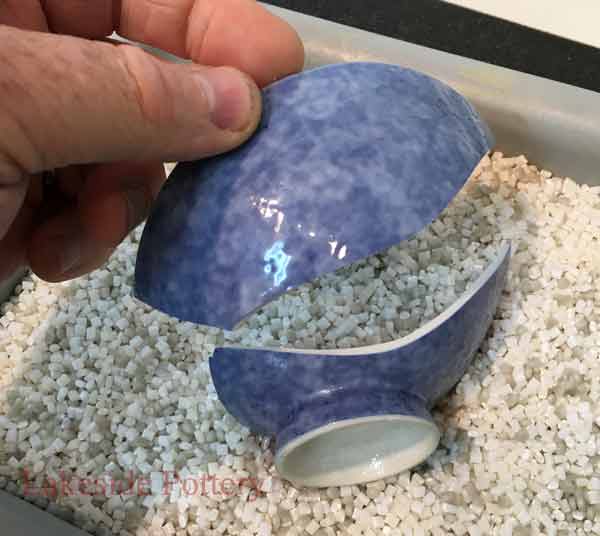
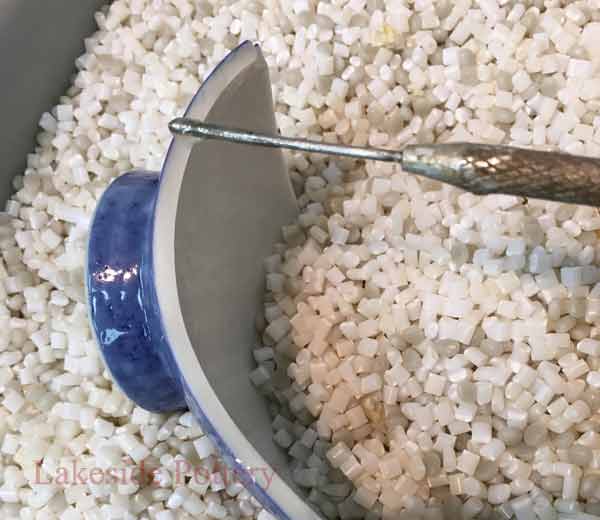
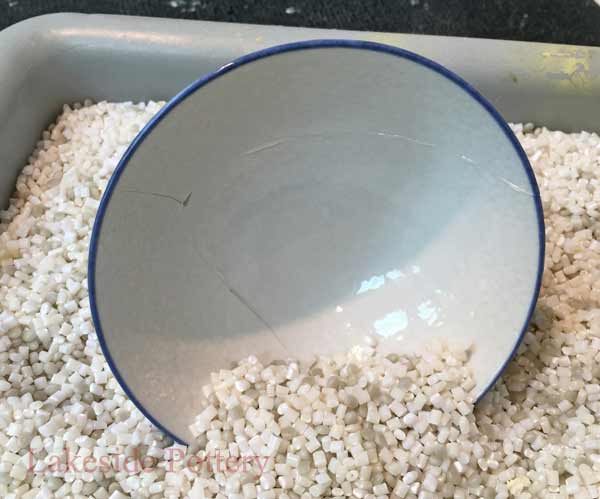
To lucifer placement of broken pieces so that gravity alone can go along proper alignment, fill a container, that is slightly larger than the slice y'all want to set up with plastic pebbles, rice, or sand. This volition cradle and hold the repaired piece however and in place while it cures.
Where to go supplies
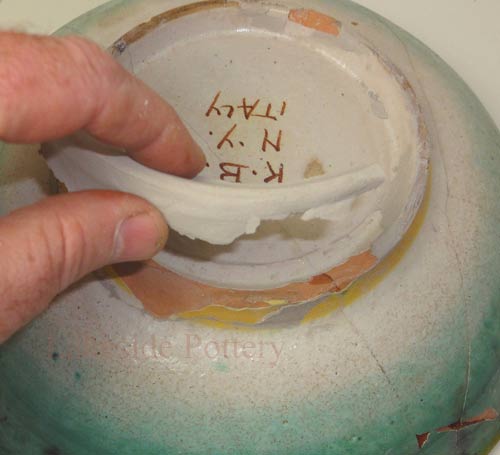
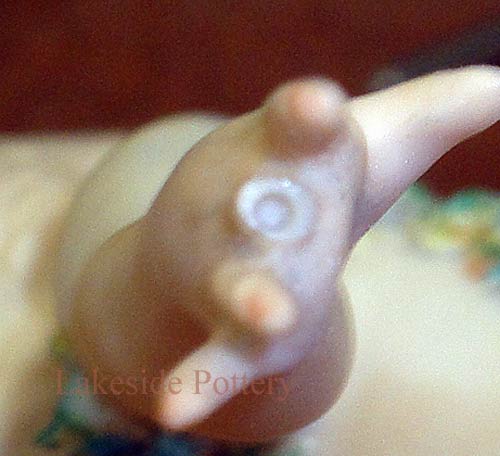
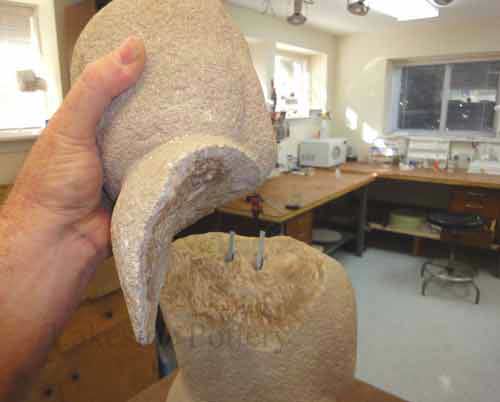
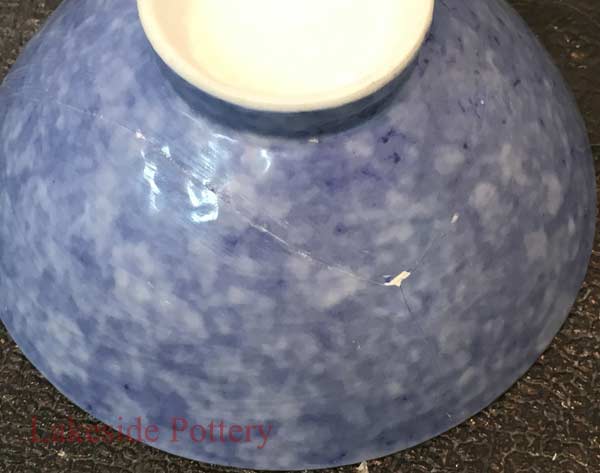
Make sure the pieces are make clean using booze. If the item has been fixed earlier clean off whatsoever erstwhile adhesive, or the new adhesive may not bond properly. Instruction to remove old adhesives. Fill a container, that is slightly larger than the slice y'all want to prepare with plastic pebbles, rice, or sand. This will cradle and hold the repaired piece notwithstanding and in place while it cures.
Place the larger broken office in the PVC pebbles / resin pellets (rice or sand) so that gravity will hold the top piece in identify. Verify fit before applying agglutinative.
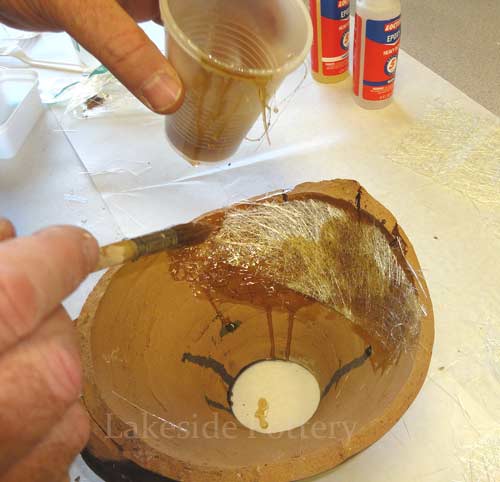
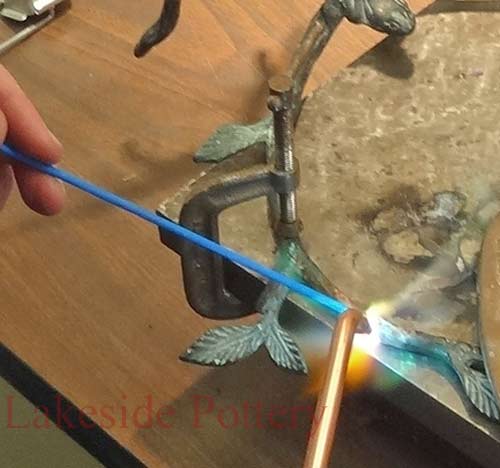
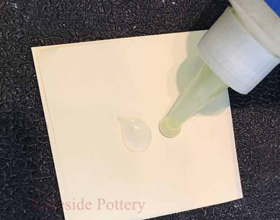
Place even amounts of v-minutes clear epoxy on a paper or paper-thin pad
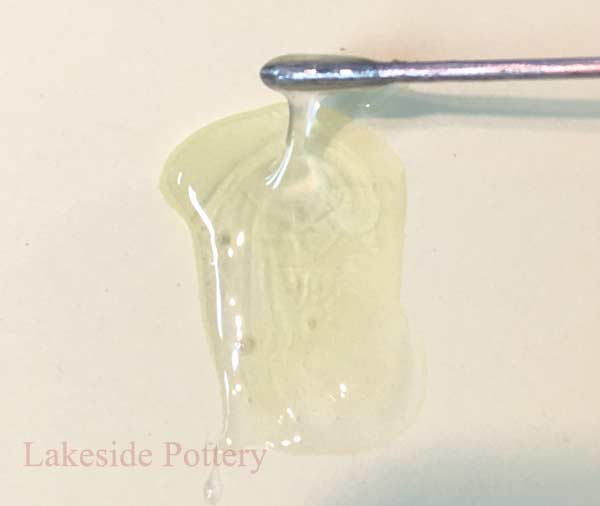
Mix epoxy well with a pin tool, paper clip or a wooden stick.
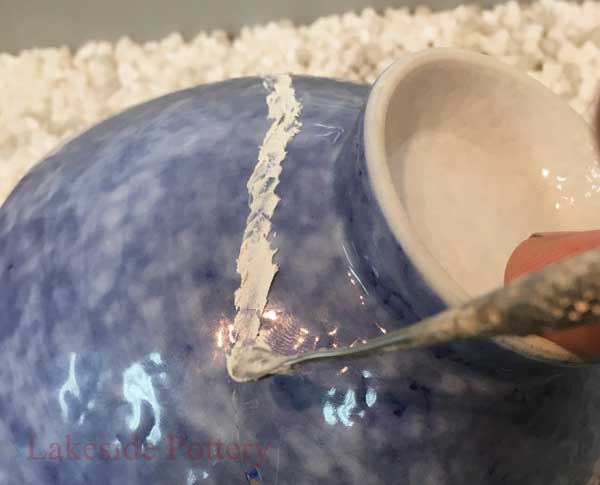
Utilise epoxy mix to one side using a pintool or a wooden stick. Use only enough adhesive to cover the edge. Likewise niggling will exit gaps, resulting in a weak repair
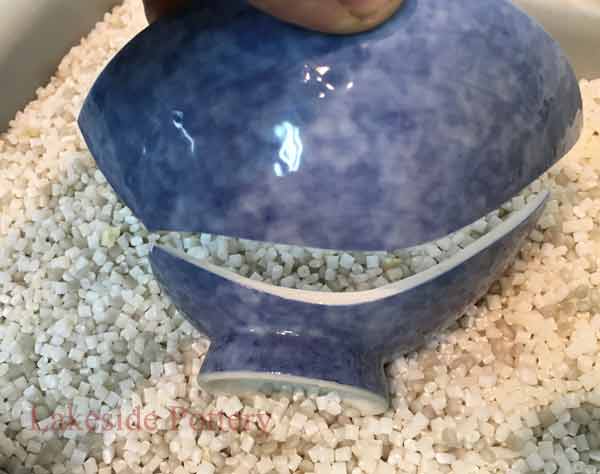
Place broken piece over the epoxy. Of import: Y'all take only about lx-90 seconds from beginning of epoxy mixing to consummate the cleaved piece'southward permanent placement earlier the epoxy becomes gummy and not workable
Quickly join the pieces together while applying light pressure to squeeze extra epoxy out. Use tweezers to apply small pieces. Y'all but have nearly sixty–90 seconds from start of epoxy mixing to placement before the epoxy becomes gummy and unworkable. Practice non wipe off the squeezed-off epoxy to avoid smearing. Look at least xx minutes before proceeding with the next piece.
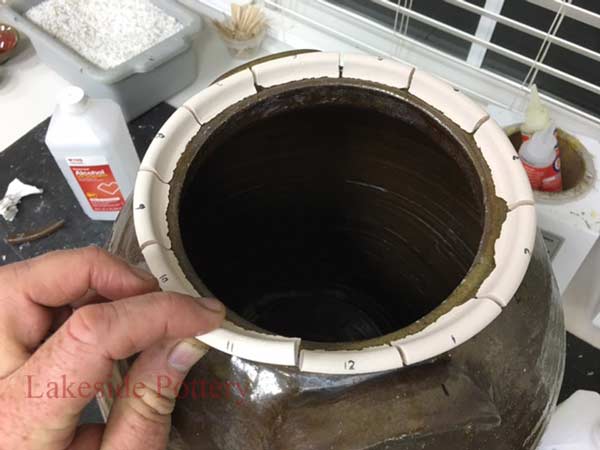
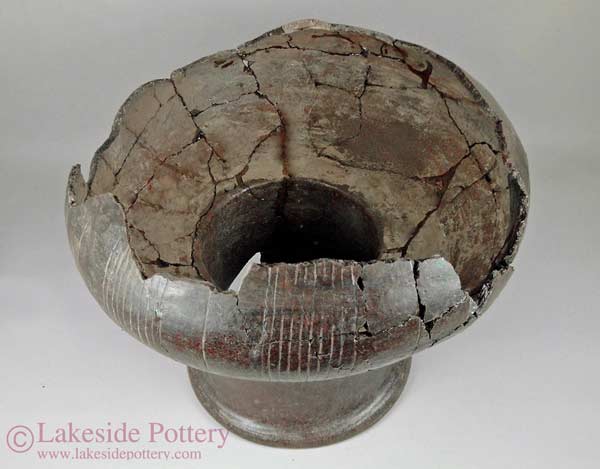
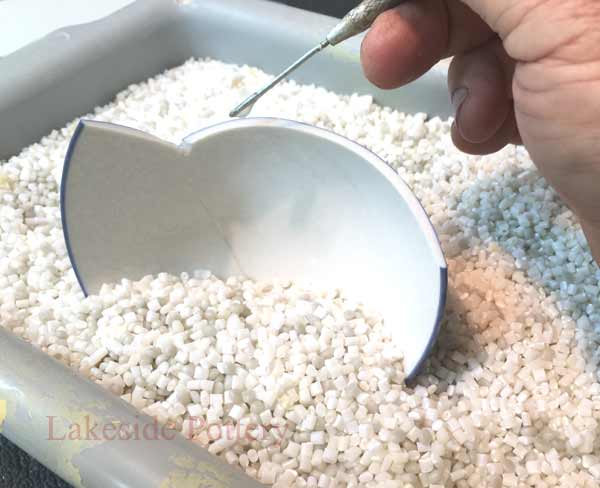
If your item is cleaved into more than a couple of pieces, program the zipper sequence to avoid being left with a terminal piece that cannot exist easily attached or fit in. Numbering the pieces after a dry run is a good thought and will assist in the actual implementation. Let each joint cure before repairing the next one.
Verify that pieces tin stay steady during the cure menses (let information technology cure at 75 degrees F or warmer)
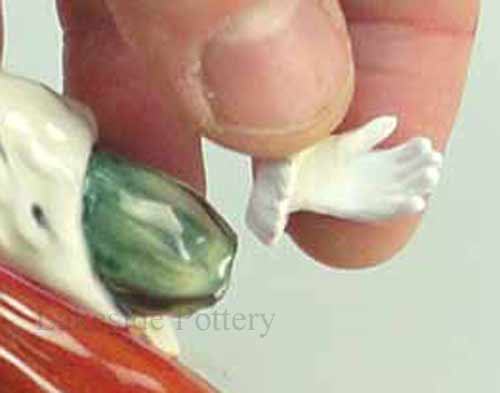
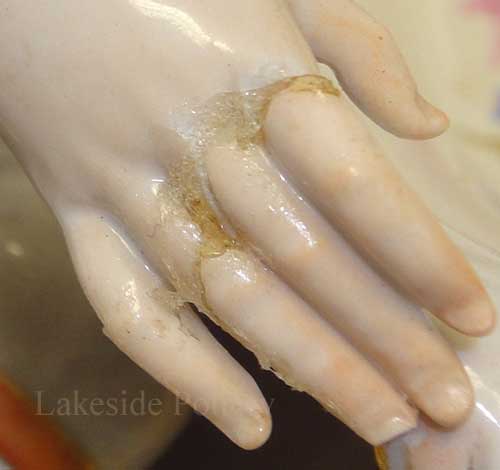
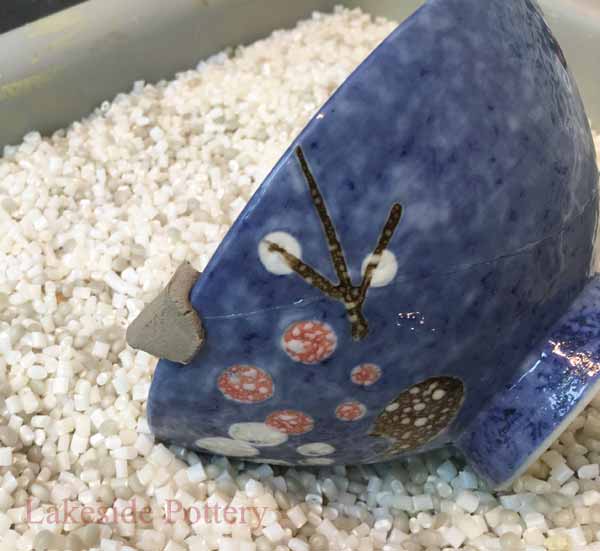
If pieces do not hold well using gravity, use clay for additional support
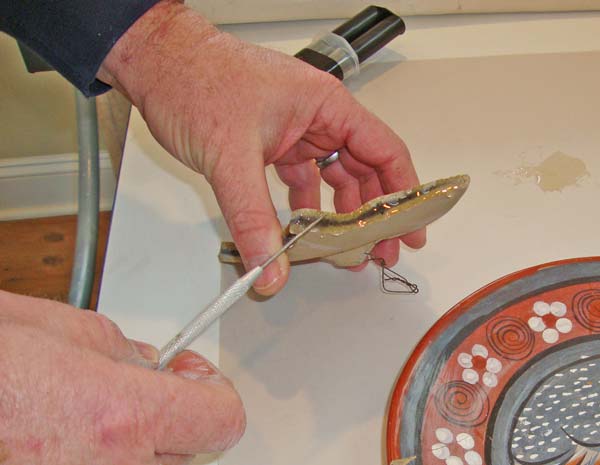
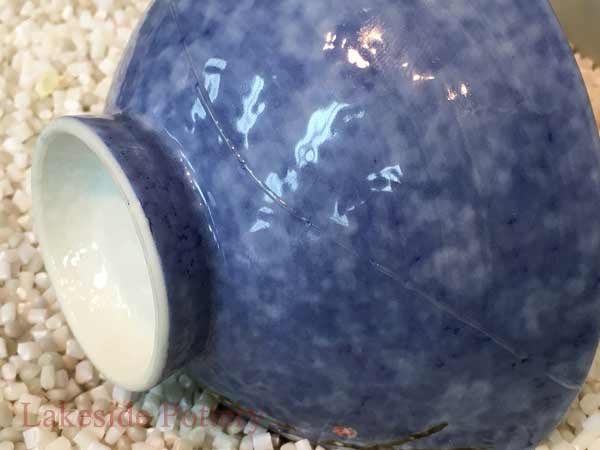
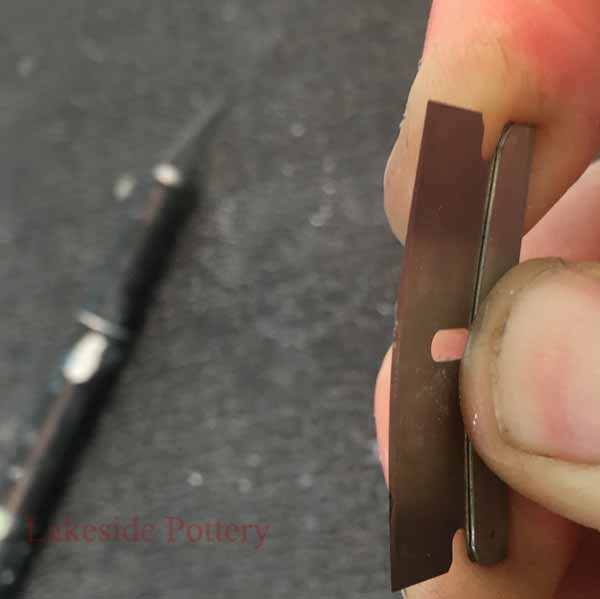
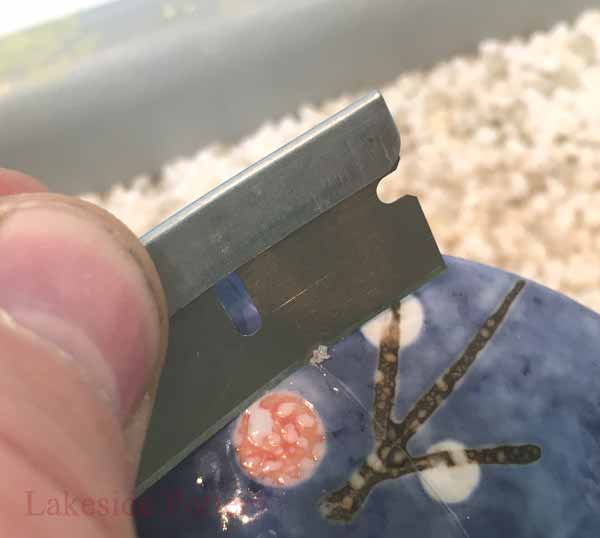
Let the epoxy cure for lx or more minutes before removing excess cured epoxy with a blade
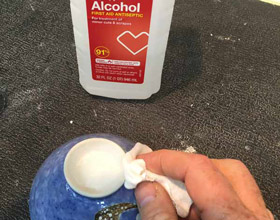
Make clean surfaces with alcohol for proper filler bonding
What yous will need for filling steps: ane. Two parts Epoxy filler PC-11 2. Dremel EZ lock 120 grit disc 3. 220 grit sand paper 3. 400 dust sand paper 4. Rag 5. Mini Spatula 6. Paper pad to mix Epoxy on 7. Denatured or 91% Alcohol
Where to get supplies
IMPORTANT: Ceramic restoration materials are not food-safe, liquid or heat-proof (over 190 degrees F) and repaired items should not be used on cooking or food serving ware more...
Wipe all surfaces with a 91% alcohol to remove dust and hand oils prior to applying filler epoxy
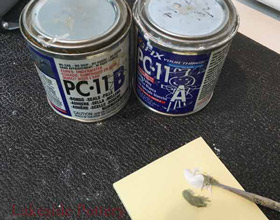
Mix even parts of PC-eleven epoxy filler. For ease of application, work in room temperature of 75 degrees F or warmer. We place the PC-eleven in a modest heater and keep it at 100 degrees F.
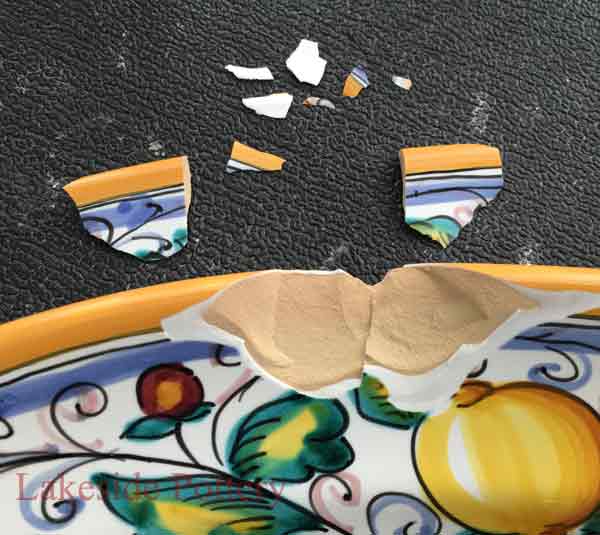
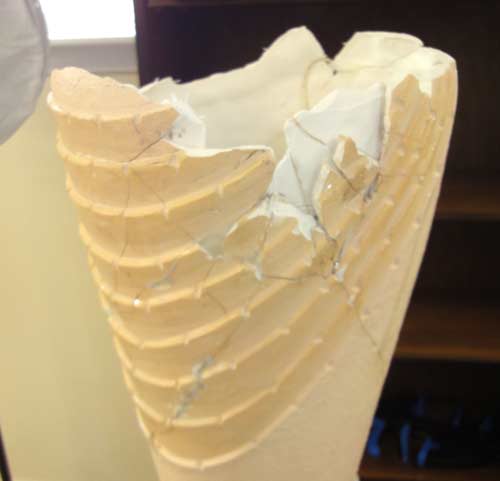
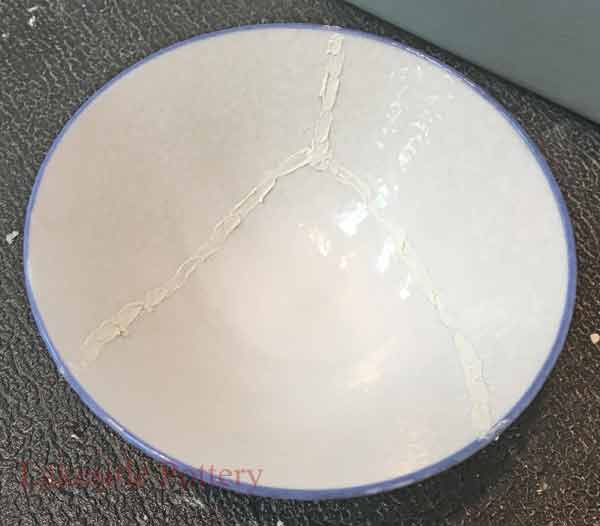
Apply thin layer of filler while pushing in to fill up cracks and missing fragments
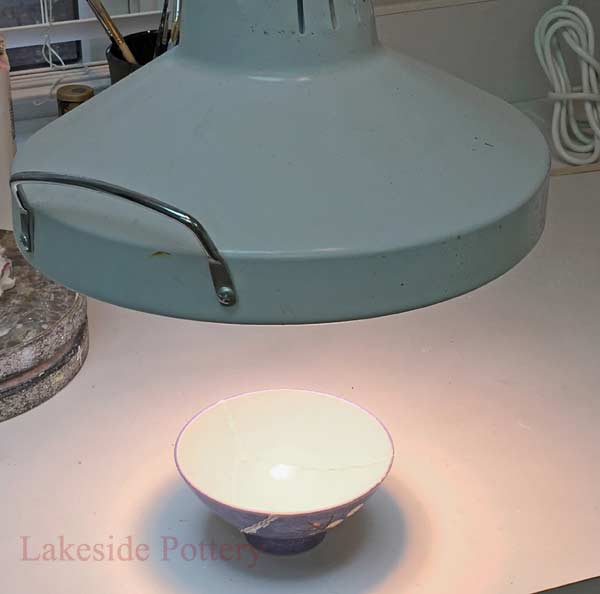
Permit filler epoxy to cure for 12 hours or more at a temperature of 75 degrees F or warmer. Nosotros place our filled projects in a 140 degrees F oven over night.
Placing under a lamp is some other practiced option to optimize hardness for better sanding functioning. Identify at to the lowest degree 12" away from repair item to avoid overheating.
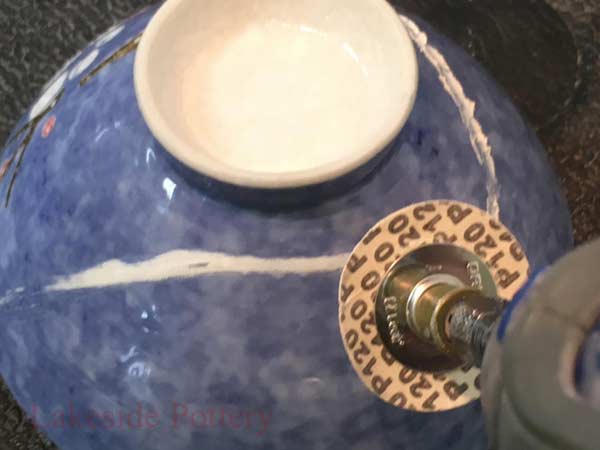
Use Dremel EZ lock sanding disc 120 dust for sanding Warning - wear protective eyewear
Use low speed to avoid burn down marks and utilise light pressure level
If sanding past manus, kickoff with 220 grit sandpaper and stop with 400 dust
If upon inspection, missed cracks are constitute, repeat the steps to a higher place for the selected areas
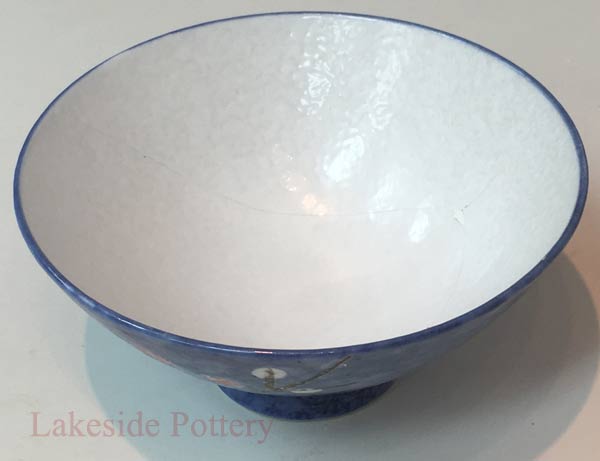
Clean with booze to set the surface for painting and common cold glazing
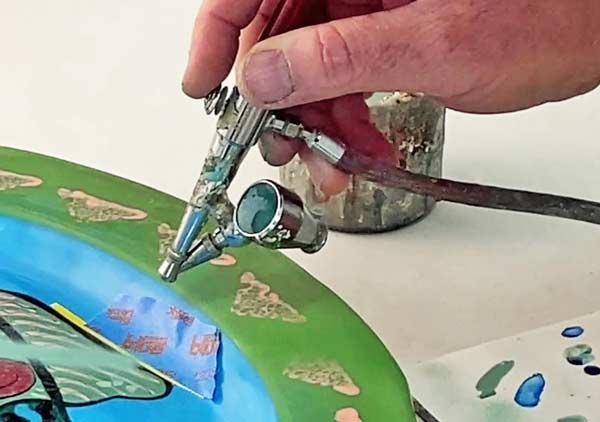
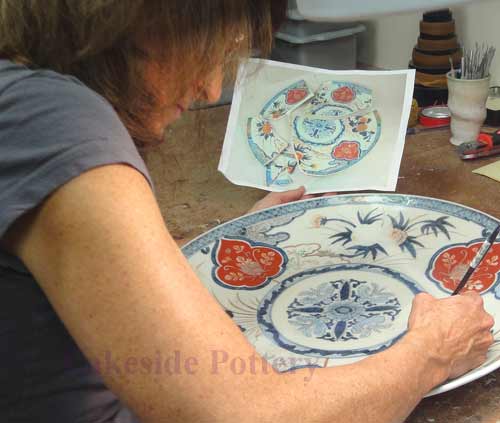
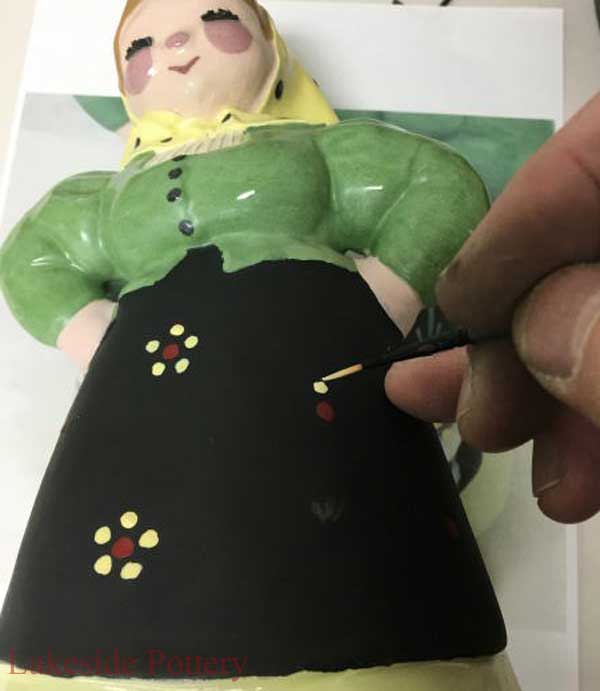
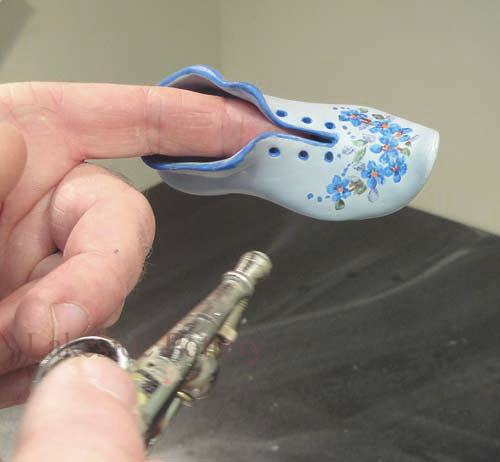
To hide the repair lines for a seamless repair, painting and application of 'Cold Glaze' are required and more details tin be seen in our Painting Lesson
A Video Lesson That Includes How to:
Remove quondam repair,
Mend the broken segments,
Fill up gaps,
Sand filler,
Paint and glaze
More than Details
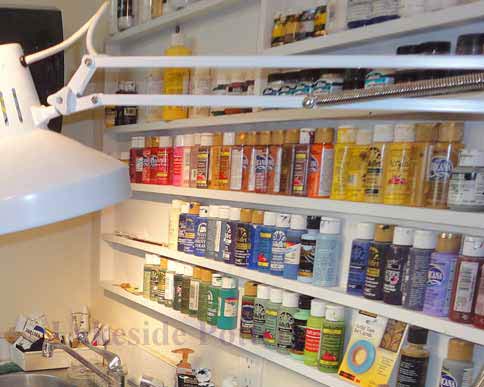
Choosing your adhesive Specific kinds of adhesives are generally used to mend ceramics. We recommend clear, 5 minute setting two-part epoxy. There are cases where a slower setting epoxy will work amend. In order to choose the correct agglutinative for a ceramic repair, yous must get-go place the type of ceramic involved. Because an exact fit is essential in repairing ceramics, you must adjust the pieces precisely before the glue sets. 5-minute epoxies and instant glues might cure also fast and are non recommended if you need longer fourth dimension to match and adjust a precise fit. We apply unlike adhesives for unlike applications. For the purposes of this tutorial, we recommend more commercially available brands that are listed in our Where to Buy Ceramic Repair Materials.
Preparing the surface The most important stride in repairing a broken ceramic is to make sure the pieces are clean. If the item has been fixed before, disengage the former repair (see how to remove erstwhile adhesive lesson), or the new agglutinative may not bond. Before handling the pieces, you may want to put on make clean gloves to protect your hands from sharp edges. Clean the pieces with alcohol.
Applying the adhesive Using a wooden stick, paper prune or a pin tool, utilise glue to only i of the broken edges. Apply just enough adhesive to embrace the border. Too little will get out gaps, resulting in a weak repair; too much will make it hard to reach a tight joint. Warming upwards the ceramic pieces to 110-140 degrees F volition sparse the epoxy, creating a improve fit, but will upshot in a faster cure fourth dimension. Apace join the pieces together while applying light pressure squeezing extra glue out. Fill a container with plastic pebbles, rice, or sand which will hold the repaired piece in identify while it cures. Use clay as illustrated above to hold the pieces together if gravity alignment is not possible. Avert shifting the pieces; small particles may come up loose, ruining the repair. Any gum that oozes from the joint tin can be removed later using a razor blade. You may use tweezers to utilise small pieces.
Fixing an particular with multiple breaks If yous have a piece of pottery, ceramic or porcelain that is broken into more than a couple of pieces, plan the sequence in which you will attach each piece to avoid being left with a final piece that cannot be easily attached. Numbering the pieces afterward a dry-run is important and will assist in the actual implementation. Let each joint cure before repairing the next one.
Filling in for missing pieces We use different products and the choices are as well numerous to listing here. PC-xi filler is a very good option and is more commercially bachelor. The key elements with fillers are:
A) Infrequent adhesion B) Will not compress while curing C) Workable - can be drilled and sanded D) Paintable E) Water / oil proof F) Will tolerate broad temperature range without shrinking or expanding. We let the filler epoxy cure at 140 degrees F enabling the filler to cure very hard which is optimal for sanding.
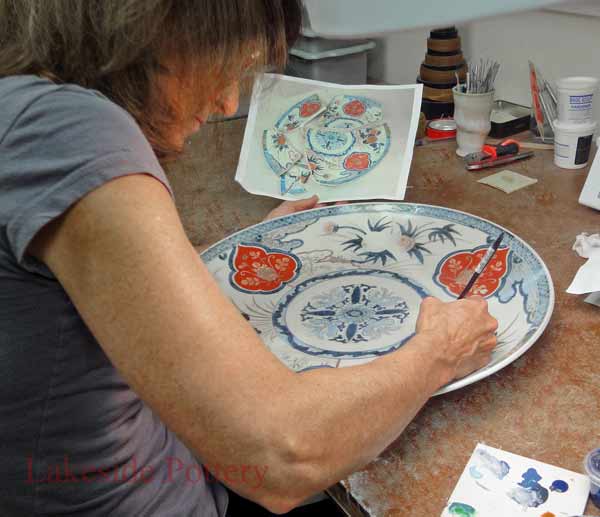
Painting / color touch up If the repair lines are not acceptable to y'all, and a seamless repair is desired, the required skill is much greater. Color matching and re-creating an artist's work and style takes time. We use high finish acrylic paints or coloring pigment powders and colored hardeners, mixed with the proper additives to create strength. And finally, information technology is essential to match the glaze sheen and the right low-cal reflection to emulate the broken item'south glaze touch as close as possible - See painting theory tutorial.


.jpg)


0 Response to "How To Repair A Ceramic Burner Ignitor"
Post a Comment